
Creating a functional camp kitchen setup transforms your outdoor cooking experience from chaotic to effortless. Whether you’re car camping with family or backpacking solo, mastering your camp kitchen layout and gear choices makes every meal smoother, faster, and more enjoyable.
In this guide, we’ll cover exactly how to set up a camp kitchen, the essential gear you need, and time-tested organization strategies used by pros.
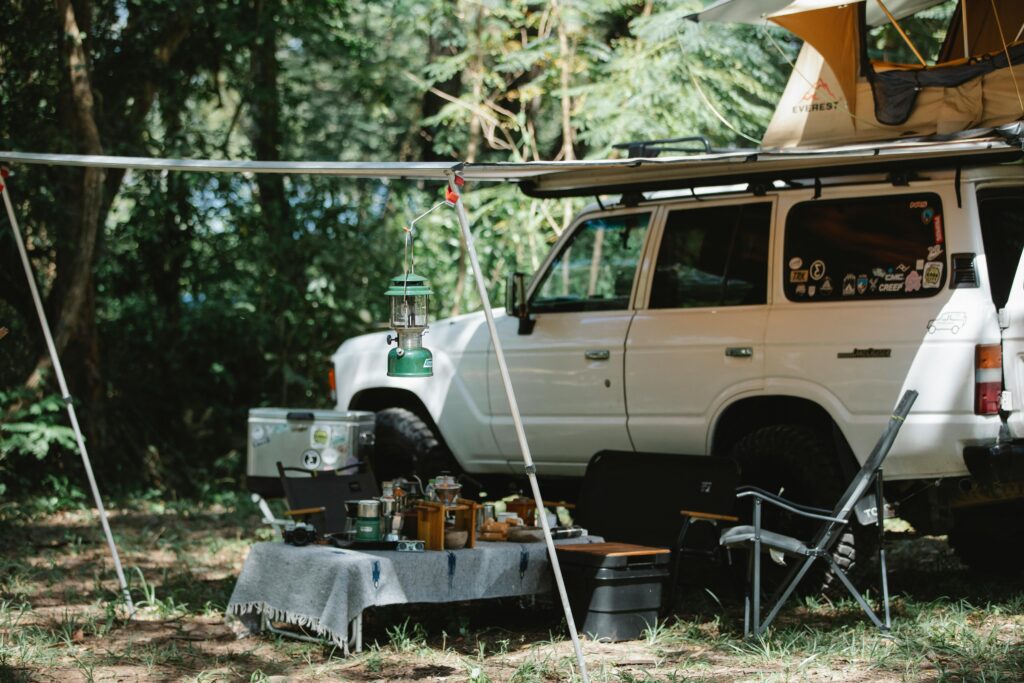
Step 1: Choose the Right Camp Kitchen Location
Before unpacking your cooking gear, pick a smart location:
- Flat and dry area, preferably close to your campsite but not inside the sleeping zone.
- Sheltered from wind using natural barriers (trees, rocks).
- Downwind from your tent to avoid attracting animals or filling your tent with cooking odors.
- If it’s sunny or rainy, position a tarp or pop-up shelter over your kitchen space.
Step 2: Core Camp Kitchen Gear Checklist
To build an efficient setup, you’ll need the right gear, compact and purpose-built. Here’s a field-tested camp kitchen essentials list:
Camp Kitchen Essentials:
- Folding camp table or camp kitchen station
- Camp stove (single or double burner)
- Propane fuel + backup
- Cooking pots, skillet, and lids (preferably nesting cookware)
- Utensils: tongs, spatula, knife, spoon
- Cutting board (foldable or bamboo)
- Wash basin or collapsible sink
- Biodegradable soap + sponge
- Water container (5+ gallons)
Optional Upgrades:
- Food prep bin with labeled compartments
- Hanging mesh rack or drying net
- Camp trash solution (foldable bin or trash bag frame)
- Camp cooler with bear lock if required
Step 3: Organizing Your Camp Kitchen Like a Pro
Efficiency matters when you’re cooking outdoors. Here’s how to organize your gear:
Camp Kitchen Zones:
- Prep Area – cutting board, utensils, bowls
- Cooking Zone – stove, fuel, hot tools
- Clean-Up Station – collapsible sink, drying rack, soap
- Dry Food + Storage – sealed bins or stackable totes
- Cold Food Zone – cooler shaded and secured
Packing Technique:
- Use clear plastic totes with labels or color codes
- Keep daily-use items in the top layer
- Group items in zipper bags or pouches (utensils, spices, etc.)
Pro Tip: Bring a hanging lantern or headlamp—cooking in the dark without light is a mess waiting to happen.
Step 4: Fire vs Stove—Choosing the Right Heat Source
When to Use a Camp Stove:
- Faster, cleaner cooking
- Consistent heat for meals like pasta, eggs, rice
- Safer in windy or dry areas (many campgrounds restrict open flames)
When to Use a Campfire:
- Cooking over coals adds flavor
- Ideal for foil packs, skewers, and one-pot stews
- More immersive, classic experience
Pro Tip: Always pack a stove—even if you plan to cook over fire—because of burn bans, rain, or wet wood.
”
Step 5: Storing Food Safely at Camp
Daytime Storage:
- Use hard-sided food bins with latching lids
- Keep bins under a tarp or shaded area to prevent spoilage
Overnight Storage:
- Store food at least 100 feet away from your sleeping area
- Use bear canisters, bear bags, or car storage (in bear-safe areas)
- Hang food when backpacking (PCT or counterbalance method)
Never keep food inside your tent—even sealed snacks.
Quick Recap:
| Step | Technique |
|---|---|
| 1 | Pick a safe, flat, wind-sheltered area |
| 2 | Use essential gear for cooking, prep, and cleanup |
| 3 | Organize into clear kitchen zones |
| 4 | Choose the right heat source based on your setup |
| 5 | Store food away from tents and wildlife |